General Tech Overview
The Tech Overview in GLFR Business, is where you can gather more technical information about your course. This regards irrigation elements mapped by the club, description and naming of elements and to gather areal calculation of specific elements / cuts which you read more about here: Areas – GLFR Business.
Within the Tech Overview you have a couple of options and tools. The first one being able to keep track of the mapped elements / cuts with descriptions and naming.
This allows you to keep track and order on all of your mapped elements. This is especially relevant in terms of irrigation. Here you have the option to give every element a name and a description, so it will be much easier to locate in the future, with help of the [Filter] tool, which you can read more about further down the article.
Below here you will find a short video, where Jacob demonstrate how to add a name and description to a specific element.

[Filter] 
When you have added a description and name to your elements, the [Filter], which is located in the top right corner, will afterwards be the tool to help you find these elements. With the [Filter] you can search up elements (e.g. fairway, bunker, green, tree, sprinkler, hydrant, electric box), to show all the specific elements mapped on your course. You can search at multiple elements at once, by comma separating each element with a comma in the search bar. For example if you want to find all of your irrigation regarding water you can e.g. write sprinkler, water pipe, drainage tube, waterbox, well, hydrant in the elements search bar, and only the written elements will appear. Same praxis works with the description and nameing.
[Groups] 
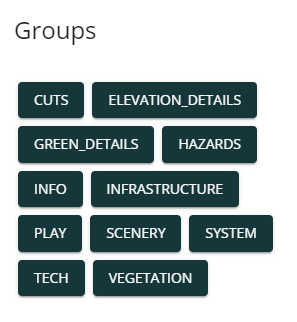
If you want a more general and faster filtering of your mapped elements you can use [Groups] located in the top right corner. [Groups] allows you to filter out unwanted elements. For example if you want to filter out vegetation and scenery, because you want a precise view of your irrigation. You simply click on the element-category you want to disable / enable.

[Log Book] 
The [Log Book] will appear on every element you click on the Tech Overview. The [Log Book] is used to keep track of maintenance or changes regarding a specific elements. For example if you have done some maintenance on a specific sprinkler, you can use the [Log Book] to write what work has been done.
The clipboard icon (the bottom one to the right) is the one that tells you what you have selected. So if you click on a element this box will pop up and tell it’s a green, fairway etc. it will tell how large the area of the element is.
You can also add Comments and pictures to the elements with the [Log Book]. This is meant for info like when a Sprinkler was last changed or when you had to re-do a teebox to get rid of some pests.
When you add a Comment your name will be added to it along with a timestamp, so everyone can see the history of changes to that element. Right now the [Log Book] only is purpose is to document maintenance or changes.

Hej Frederik
Hvordan sletter jeg en registrering? F.eks. en brønd.
Hej Mikael
For at slette et objekt skal du ind under Courses, vælge hullet fra listen og derefter finde “Edit Drawing” ud til højre, under billedet. Her får du en forsimplet tegning af hullet, hvor du kan se alle elementerne.
Find den givne brønd og klik på den – det kan hjælpe at zoome lidt ind. Herefter vælger du Delete i værktøjslinjen ude til venstre, markeret med en logo af en skraldespand. Husk at Save på “disketten” nederst i værktøjslinjen, når du har slettet det du ønskede 🙂
Skriv endelig til support@glfr.com, hvis det driller!
Når jeg zommer så forsvinner halve kartet, og jeg får heller ikke navigert på den halv siden jeg ser
Hej Fredrik
Har du mulighed for at sende et screenshot af det?
Du må under alle omstændigheder gerne skrive på support.b2b@glfr.com hvis det stadig er et problem, så må vi finde af hvad der foregår.